Nothing is for sale here. Freewill tips keep the site running. Want to help? → Tip via Paypal
Add Images to Your Web Pages
 Adding images to web pages is where the fun begins for many folks. Up to the point where there are some graphics involved, a web page looks like any old boring text file.
A basic image tag is written like this:
<img src="mom.jpg">
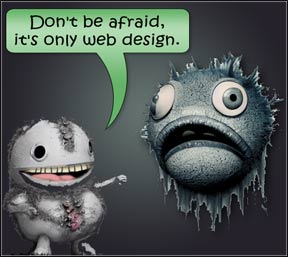
In that line of code, img is short for image, and src is short for source. The code tells the browser to open a jpg image named mom.
Um . . . I’m guessing it’s a picture of your mom.
That code also tells the browser the image is in the same directory as the web page. If the image is in another directory (folder), one named images for example, then we’d have to include the images folder in the path to the image in our code. The code would then look like this:
<img src="images/mom.jpg">
That tells the browser to look in a directory named images for an image named mom.jpg. Please see the server paths tutorial to learn more about using the correct path to files.
The above code sample will get the job done, but there are other attributes and values that should be included with every image except a background image.
By adding the width and height of the image the browser knows how much space to reserve for the image. This makes the page display slightly faster because the viewing browser doesn’t have to keep adjusting the layout as image data downloads. It also makes it easier for your visitors to read your content because the page isn’t being rearranged as they read.
Let’s add the width and height to that portrait of your good ol’ mom now. There are two ways to do it. The first uses HTML attributes and values. It goes like this:
<img src="mom.jpg" width="480" height="360">
Most portraits of a person are a little taller than wide, but because your mom has such a big nose this one is wider than it is tall. Life's low points can make you bitter or better. Choose wisely.

That's how it was done before CSS was developed. Now you can use CSS to add the width and height instead. Here's how:
<img src="mom.jpg" style="width: 480px; height: 360px;">
The part highlighted in yellow shows the style code. You may wonder why you'd want to use CSS when it's a few more letters to type. There are other CSS properties and values you can add that do things like create space around the image, add a border to the image, allows text to flow around an image and more.
NOTE | The CSS property is the equivalent of the HTML attribute. See the Introduction to CSS tutorial for more on that. |
You'll also need to use CSS for your site to be responsive, like this one, unless all your images are small enough to fit on a smart phone screen. Being "responsive" means the site will adjust to various screen sizes without causing a horizontal scrollbar. There are other factors that determine how responsive a site is, so don't think that's all there is to it. Moving along...
You should also add alt text, which is short for alternative text, to your images. Alt text provides a brief description of the image for people using browsers that don’t have native graphics capability or have images turned off in their browser preferences for faster surfing.
Instead of showing an image, non-graphical browsers show the alt text. The alt text is also read aloud by screen readers so visually impaired people can understand what an image is about.
Alt text is added like this:
<img src="mom.jpg" width="480" height="360" alt="My dear mother and her big nose.">
You should keep the alt description short. In older browsers, and maybe an oddball browser or three, the text in the alt attribute pops up in a little balloon for a few seconds when the cursor is resting on it.
Alt text can be added to any image except a background, and should be added to any image that’s part of your content. You may want to make an exception for an image that is part of your design.
For example, some sites use little images of rounded corners in the design of their site so everything isn’t squared off. The rounded corners are part of the design framework, rather than part of the content. As such, you may not want to have alt text pop up if someone happens to place their cursor on it just to have it offer the word “corner” or some other meaningless message.
As CSS has progressed, you can create rounded corners just with code, so doing it with images is no longer necessary. It was pretty common several years ago, however. Anyway, that was just an example.
If you decide you don’t want alt text on such images, you should still include the alt tag so the page will validate, just don’t put text inside the quotation marks. Example:
<img src="corner.gif" width="30" height="30" alt="">
That’s the scoop on images. It’s not as good as a scoop of ice cream, but it does have fewer calories.