How to Add Text to Blank Buttons
Take a look at the buttons on the right. If you're viewing this with a browser that supports the hover color, such as Internet Explorer or Firefox, you can place your cursor on the button text and watch it change colors.
They look like a series of individual buttons, but all the buttons are the same blank button. I call this the Mighty Mouseover Button technique.
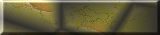
Here's the blank button I used for all the buttons:
Advantages
So what are the advantages of this technique?
-
Speed, space, and time! Since all those buttons are really just one blank button, your page will load faster than if you had several individual images. The more buttons you need, the more download time is saved. And with only one button, you save disk space on your server. You also save time creating buttons. Instead of making individual buttons, you can copy and paste the code for as many buttons as you need, just change the link and link text.
-
You can have any text you want on the button. Instead of trying to find buttons with the text you want or making your own, just find some cool blank ones and add your own text! I offer free blank buttons in my Graphics Archive section.
-
Any time you want to add a button because you've added new content, you can do it in seconds because you don't have to make a new image. If you don't have my Background Magic program to easily make your own buttons, this advantage can be very handy.
Here's how it's done...
To make Mighty Mouseover Buttons, you first need to place an embedded style tag in the <HEAD> section of your HTML page.
<style type="text/css">
a:link {color:#000080; text-decoration: none;}
a:visited {color:#946C6B; text-decoration: none;}
a:hover {color:#FF0000; text-decoration: none;}
a:active {color: #B70004; text-decoration: none;}
</style>
That is the part that controls the link colors and removes the default underline from the link text. Change the colors to your liking. If you want your link text underlined, remove the part that reads, text-decoration: none; from each link state where you want an underline. You can also place the link properties in an external style sheet if you have your web site set up that way.
-
a:link ...is the color of an unvisited link when there is no cursor on it.
- a:visited ...sets the color of a visited link.
- a:hover ...is the color the text changes to when the cursor is on the text.
- a:active ...is the color of the text when the link is active. With high speed internet and increasingly fast service, this often isn't noticeable.
Note that I didn't use all the link properties on the demo buttons.
Next comes the tricky part, but it's not too bad if you've ever worked with tables before. Below is the code for one button:
<table cellpadding="0" cellspacing="0" border="0">
<tr>
<td style="background-image: url(images/button.jpg);
 width: 160px; height: 35px;
 text-align: center;
 vertical-align: middle;">
<a href="index.html">Home Page</a>
</td></tr></table>
You'd repeat this code for each button, just changing the URL and link title to create a new button. Let's break it all down to be sure you understand what's going on.
<table cellpadding="0" cellspacing="0" border="0">
The button must be contained in a table in order to get the text to line up precisely, and the cellpadding, cellspacing, and border should all be set to zero for the best results.
<tr>
Every table has a row, if you need more explanation than that please see my tables tutorial.
<td style="background-image: url(images/button.jpg);
width: 147px; height: 45px;
text-align: center; vertical-align: middle;">
The table data cell contains all the CSS magic that makes this technique work. The first line of the above code tells the browser to use a background image for the table data cell and indicates the background image name and file type, and where to find it. The background image is the blank button.
The second line sets the width and height of the table data cell.
The third line centers the text horizontally and vertically within the table data cell.
<a href="index.html" style="text-decoration:none">Home Page</a>
This, of course, is the actual link. Change the link and link text for each unique button.
Note: The style="text-decoration:none" I show in gray removes the underline from the link. I also showed that in the <HEAD> section style tags earlier, but if you use plain text links on the same page and want the plain text links to be underlined, using the text-decoration property in the HEAD section will remove the underline from the plain text links too. If you don't want that to happen, remove the text-decoration string from the HEAD section and add it to the link code as shown in gray above. If you don't want any links to be underlined and have the text-decoration string in the HEAD section style code, then it isn't necessary to repeat it in the link.
The rest of the code, of course, just cancels the link and the table. You can include a change in font size, add a bold tag, or any other code you would normally want to use with your links as well. For the sake of simplicity, I didn't show that, but on the button examples on this page I did change the font size with each button link.
Other things to know...
-
If you use the buttons in a vertical array, then you'll need to put the button tables inside a two-column control table. Usually, in a control table the first column would hold all the buttons, and the second column would hold your page content. That's not as hard as it might sound, give it a shot. Bang! If needed, I do have a tutorial showing how to use a two-column table.
-
In the control table mentioned above, for the two columns (the TD cells), use the valign="top" HTML attribute or the vertical-align: top; CSS property with them so that the content of both cells starts at the top.
-
You would also have to put these button tables inside a control table to do a horizontal menu bar style button set as well. Each button would have it's own TD cell in the control table.
-
To make the link text grow bigger on mouseover as I did on the demo buttons, simply code a larger font size into the hover property. If you do, make sure your hover text doesn't force the table cell larger or it really looks goofy.
-
If you make your link text longer than the button it will force the td cell bigger than your code and cause the background (button) to repeat in the cell, so it would no longer look like individual buttons. That looks like heck and defeats the purpose, so pick short, descriptive text links. Before starting a bunch of buttons, try coding your longest link text onto one. If it's too long and you can't change the wording, you'll need to find a bigger blank button.
-
Lastly, if you forget to close a table, it will cause Netscape to destroy your hard drive! Ok, not really, but it will cause the page from where an open table is on down to show up blank. If you are surfing and run into a blank page on someone's site, chances are they forgot to close a table.
PSST - If you're anxious to try this, there are blank buttons in my free image archive.
Now go thank your lucky stars for your good fortune! It's much greater than you realize.
|
Almost a Newsletter
Changing list hosts. Will post a new subscribe form shortly.
Did you know...
The member's site has about 100 standards compliant HTML and CSS tutorials, 31 handy reference charts, reprintable content, web graphics, exclusive fonts, free software, free ebooks and more? All this for less than 9 cents a day! [ Details ]
|


